How To Make A Homemade Coat Rack
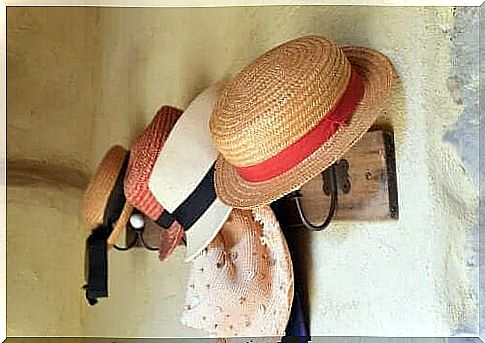
Today we tell you how to make a homemade coat rack. Of course , you can also use it for your coats, purse, umbrella or any other thing you need to hang up. You rarely find coat hangers in modern homes these days. However, they are really useful and can also be decorative.
With a little imagination, you can make a coat rack in exactly the style you are into. For example, you can either make it modern or rustic. What you think best suits the decor of your home. The best thing about it all is that you do not have to spend a lot of money because you can use materials you already have at home!
How to make a homemade coat rack from bottles
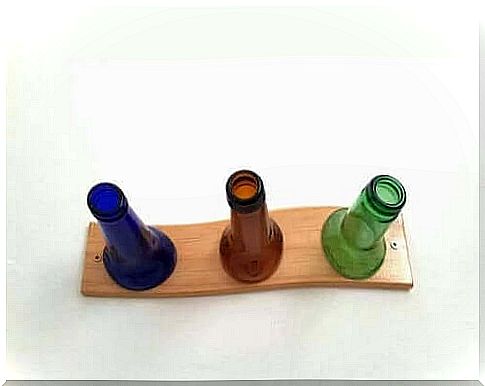
The empty bottles you have collected can easily be used to make a nice coat rack. You can use them to hang hats and other accessories.
This is what you need
- 4 or 5 glass bottles (you can use as many as you want, and mix and match shapes and styles).
- 1 rectangular wood, glass or acrylic
- A piece of thin cotton cord
- Alcohol
- A lighter
- A container of water
- A hot glue chair
Instructions
- First, tie the string around a bottle, about 5 cm below the neck. Make sure that the cord has only one turn and is well adjusted.
- Then wet the cord with your alcohol so that it is well soaked.
- Ignite the cord with the lighter. It may be necessary to do this a few times if the flame goes out too fast.
- After approx. one minute continuous fire, immerse the bottle in the water tank. You will hear a click, which means the glass is cracked. Now the bottle is divided along the string.
- Repeat the process with the rest of the bottles. Measure them to make sure they are all the same size.
- Mark where you would like to place the bottlenecks on your piece of wood, glass or acrylic sheet.
- Then apply some glue to the cut edge of the bottles.
- Then place the bottles on the marks you made on the board with glue.
- As the last one, you can hang it on the wall using nails or screws.
Also read: How to recycle glass bottles as decoration in the garden
A homemade coat rack with wood and forks
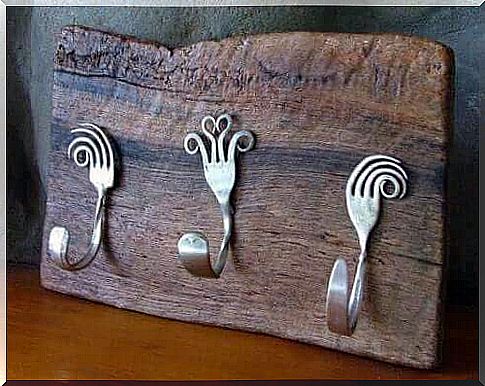
This is a simple and inexpensive way to make a coat rack. Just bend the forks and hang them on a board or wall.
This is what you need
- Old forks
- seaweed
- A drill with a small metal drill
- A piece of wood
Instructions
- First, mount the forks on the wood with tape or tape.
- Then drill a small hole in the fork handle.
- Take the fork and bend it upwards with pliers. Start from the middle.
- You can also bend some of the fork teeth to make a funky design.
- Finally, nail the fork to the board in the hole you drilled before.
- You can also nail the forks directly to the wall.
Also read: Make your own beautiful recyclable shopping bags
A rustic homemade coat rack
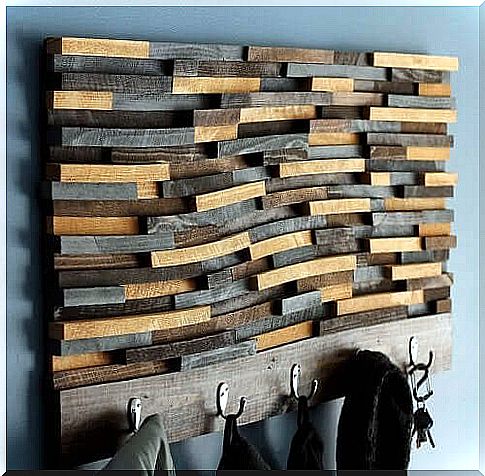
Rustic coat racks are ideal for rooms and spaces where you have other rustic decorations. They are also a great addition to vintage decor.
This is what you need
- Coat hooks (available at hardware stores)
- Tree
- Nails and a hammer
- Paint
Instructions
- First, cut a lot of rectangular pieces of wood.
- Then paint them to your liking.
- Arrange them to your liking and nail them in place.
- Then nail or screw the hooks onto the bottom of the board.
- As the last one, you can nail the coat rack directly to the wall by making holes in the top corners or you can nail hooks on the back.
Have you ever tried to make a homemade coat rack? As you can see, they are really easy to make and you can use any materials you may have at home!